


Exporting & Importing certificates
Introduction
By exporting a certificate installed in your Web browser, you can import the same certificate to other applications and PCs.
Each Web browser and OS stores certificates in the following locations.
| OS | Apps etc. | Storage of imported certificates (References for each Apps) |
|---|---|---|
| Windows | Windows (For wireless LAN configuration (JAIST, eduroam)) | Windows Certificate Store (Control Panel -> Internet Options -> Contents) |
| Microsoft Edge | ||
| Google Chrome | ||
| Internet Explorer | ||
| Firefox | Managed in Firefox (Options -> Privacy & Security -> View Certificates) | |
| macOS | macOS (For wireless LAN configuration (JAIST, eduroam)) | Keychain Access.app (Applications → Utilities) |
| Safari | ||
| Google Chrome | ||
| Firefox | Managed in Firefox (Preferences -> Privacy & Security -> View Certificates) |
Installing
For details on how to install the certificate, refer to the following manual provided by NII.
* Don't import to a PC that may be used by others.
* Don't forget to check "Mark this key as exportable" in the Certificate Import Wizard for Windows OS.
[Password required at the time of import]
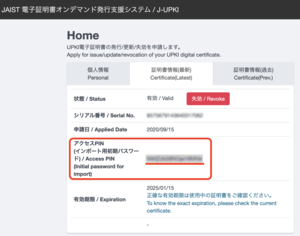
The password required when importing downloaded files is listed in the "Access PIN (initial password for import)" of the J-UPKI system (only available on campus LAN including SSL-VPN).
- The password for the private key (Edge and Chrome on Windows OS)
- The password for "XXXX.p12" (Safari and Chrome on mac OS)
- The password that was used to encrytp this certificate backup (Firefox)
- The password to extract the certificate (Android OS)
- The password for certificate (iOS)
For exported certificates, the password will be the one you set yourself.
UPKI Digital Certificate Issuing Service Manual
*When using the on-campus Wi-Fi service (SSID: JAIST / eduroam), please refer to the following.
[Windows OS] Internet Explorer/ Edge/ Chrome/ Opera (Windows) Edition
[mac OS] Safari/ Chrome/ Opera (macOS) Edition
[Android OS] Android Edition
[iOS] iOS Edition
Import of certificates issued after December 14, 2023
Please note the following procedure when importing certificates issued after the maintenance on or after December 14, 2023.
[Windows]
- For the certificate store, check "Automatically select the certificate store based on the type of certificate".
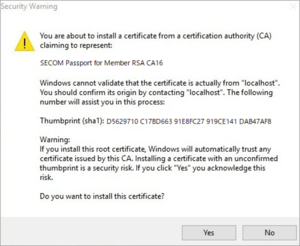
- If the root certificate is not installed, a Security Warning screen will pop up. Confirm that the "thumbprint (sha1)" is "D5629710 C17BD663 91E8FC27 919CE141 DAB47AF8" then click "Yes".
For more information, please see the following page (in Japanese).
個人認証用証明書CAのプライベート化による、証明書のインストール方法の変更点が知りたい
【mac OS】
- If a dialog box regarding trusting certificates appears, go to Details and confirm that the "Fingerprints SHA-1" is "D5 62 97 10 C1 7B D6 63 91 E8 FC 27 91 9C E1 41 DA B4 7A F8" and select "Always Trust".
- If the message "Certificate is not trusted" is displayed after importing the certificate, similarly, check the "Fingerprint SHA-1" under "View Information" in the root certificate. If it is correct, select "Always trust" for "When using this certificate" under "Trust".
Procedure for exporting certificates with Firefox
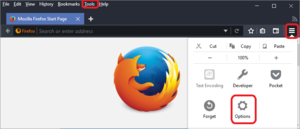
Open the "Options" sub-menu from "Tools" menu or from the menu icon.
(For Mac OS X users: "Firefox"→"Preferences")
Choose the following sequence; "Privacy & Security" → "Certificates" → "View Certificates".
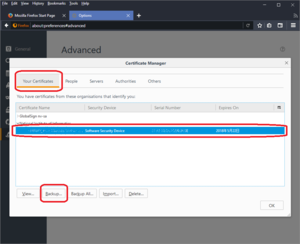
Select "Your certificates" tab to display a list of the client certificates installed.
Select the certificate you want to export and click "Backup".
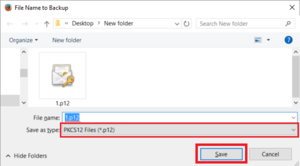
Choose where to save the certificate file and enter a name in the "file name" field.
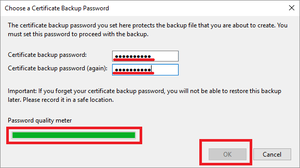
Enter a password to protect the file that will be saved (the exported file) and click "OK".
Check the "Password quality meter" to make a password that is not easily broken.
Also, remember this password, it will be needed whenever the certificate file will be imported again.

When the export is successfully finished, a notification will be displayed, click "OK".
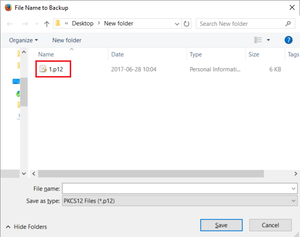
The file name chosen will be generated in the specified location, in the example, "1.p12" in "New folder").
Please make sure the exported file will not be accessed by others.
Procedure for exporting certificates with Edge Chromium, Google Chrome and Internet Explorer for Windows
Using the Windows OS search box, search for "Internet Options" and open "Internet Options".
Alternatively, you can go to "Control Panel" of Windows OS (→ "Network and Internet") and open "Internet Options".
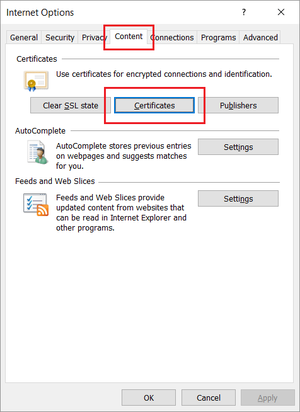
Select the "Content" tab and click "Certificates".
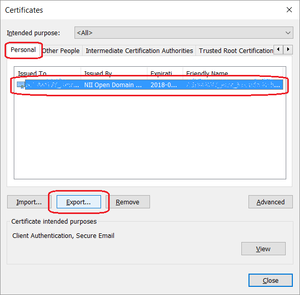
Choose the "Personal" tab, then select the certificate to export, and click "Export".
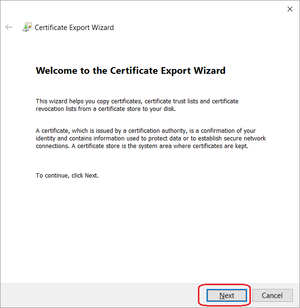
The Certificate Export Wizard will start, just click "Next".
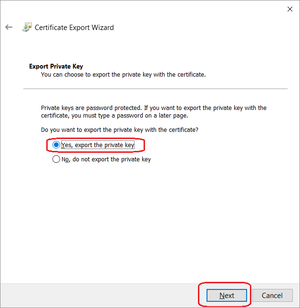
Choose "Yes, export the private key", then click "Next".
If its option is grayed out, the digital certificate cannot be exported correctly. Please use the .p12 file downloaded when the certificate was issued, or revoke and reacquire the digital certificate.
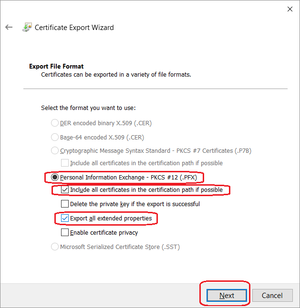
Choose all of the following:
"Personal Information Exchange - PKCS #12 (.PFX)",
"Include all certificates in the certification path if possible"
"Export all extended properties".
Finally, click "Next".
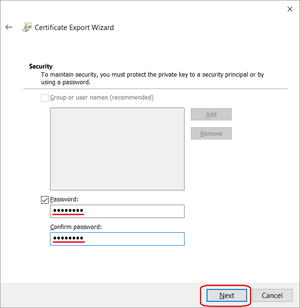
To protect the exported file, enter a new password and click "Next".
Choose a passwords that would be hard to break.
Also, remember this password because it is necessary when importing the certificate file again.
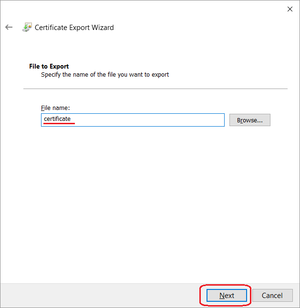
Enter a name for to the file to be saved in the "file name" field.
By default, the storage location is the desktop. Be careful not to forget the saving destination.
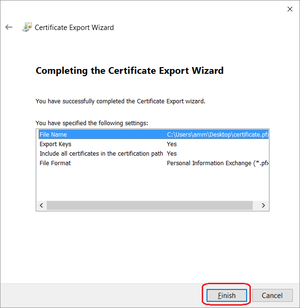
When the completing screen of the export wizard appears, click "Finish".
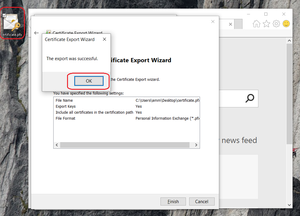
The file would be saved in the specified or default location and export is completed.