


Webmail
URL and supported web browser
You can read and send e-mails using a web browser such as Microsoft Edge, Mozilla Firefox, or Google Chrome.
When using from an off-campus network (excluding VPN connection), multi-step authentication (password and one-time password authentication, client certificate authentication, FIDO2 authentication or Windows Desktop authentication) is used.
Please refer to this page for multi-step authentication.
・Browsers and OSs that have been confirmed to work(2021/02)
| Windows 11 | Linux(Red Hat, | Mac OS 10.15 or later | Android | iOS |
|---|---|---|---|---|---|
Microsoft Edge | 〇 | ー | ー | ー | ー |
Mozilla Firefox | ○ | ○ | ○ | ○ | ○ |
Apple Safari | ー | ー | ○ | ー | ○ |
Google Chrome | ○ | ○ | ○ | ○ | ○ |
○: Supported. Please use the stable version.
※ Manufacturer site(System requirements)
ー: Not supported.
Malfunction of Webmail email address autocomplete (2025/4/3)
We have confirmed that some email addresses are not appearing in the autocomplete list in Webmail.
It has confirmed that this is a bug.
We apologize for the inconvenience and ask for your patience.
Login/Logout
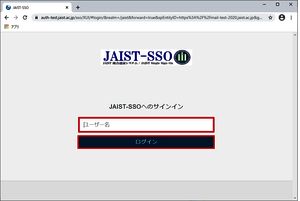
Login
Access the following URL with a web browser.
Enter your「Username」and click「Login」.
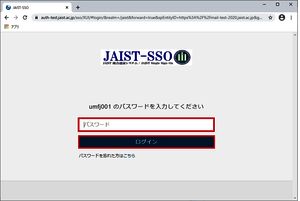
Enter your「Password」and click「Login」.
and then click 「Sign In」 to login.
* If you input mail address(e.g. xxxxx@jaist.ac.jp) at UserName, you will be failed to log in.
When using from an off-campus network (excluding VPN connection), you will be asked to authenticate with a one-time password etc after that, so enter it.
Logout
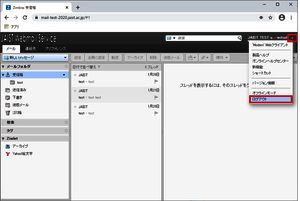
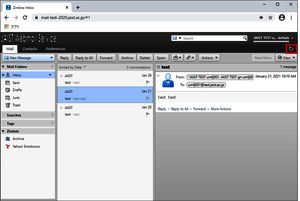
Classic UI
Click 「▽」 , up right side of the browser, and click 「Sign Out」 in shown list.
Modern UI
Click your username at the top right of the screen, then click「Logout」 from the View menu.
Close your browser when you are logged out.
UI switching
※ Mobile users are recommended to use the Modern UI.
Classic UI
(Temporary) Click ▽ at the top right of the screen, and click「'Modern' Web Client」from the View menu.
(Permanent) Select 「Preferences」tab and click 「General」. Checked 「Modern」in the 「Default Web App」 and click 「Save」.
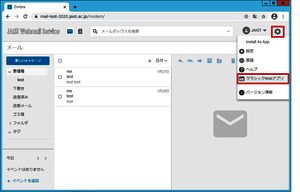
Modern UI
(Temporary) Click the gear icon ☸ at the top right of the screen, and click「Classic Web App」from the View menu.
(Permanent) Click the gear icon ☸ at the top right of the screen, and click「Settings」from the View menu.
Checked 「Classic」in the 「Zimbra Version」 and click 「Save」.
Receive Email
Classic UI
Click the Refresh Current View icon (circular arrow) in the upper right corner.
Modern UI
Click the refresh icon (circular arrow) that appears when you mouse over your inbox.
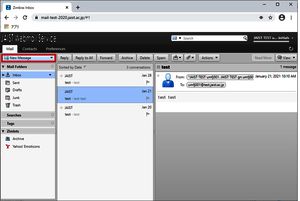
Read Email
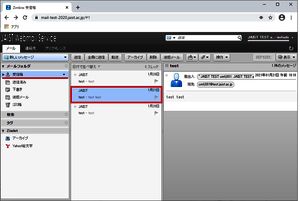
Classic UI / Modern UI
Click 「Inbox」 to see the list of emails you received.
Click an email subject in the list. it shows a message.
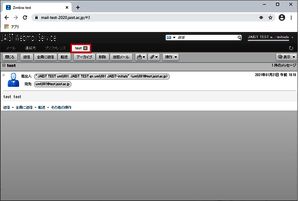
When you want to see the message in full range of browser, double click the email subject.
It opens in new tab.
Create and Send Email
Classic UI / Modern UI
1.Click 「New Message」
2.Enter address, subject, message etc...
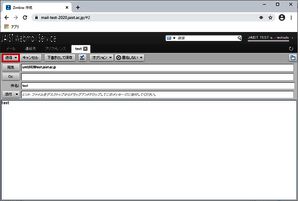
3.Click 「Send」 to send the email.
The email you have sent will be saved in 「Sent」 folder.
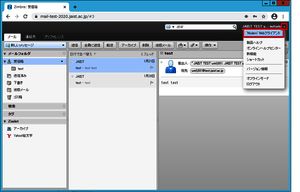
Search Email
Classic UI / Modern UI
1.Enter the search word in Search box, up right side of the browser.
2.Use 「Basic Filters」, 「Advanced Filters」, if you want to search with more details.
※ In Modern UI, you can specify detailed conditions by clicking "Refine".
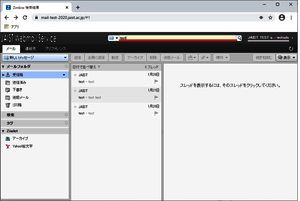
Delete Email
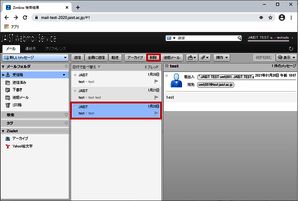
Classic UI / Modern UI
1.Click email you want to delete, and then click 「Delete」.
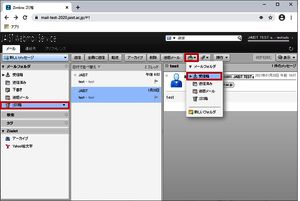
2.If you want to restore email from Trash, click email in Trash.
Click the icon of 「Move selected item(s)」 then select the folder in which you want to restore.
Or, you can also move email by drag and drop email.
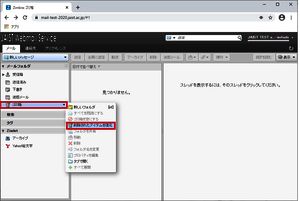
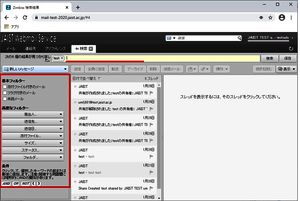
3.You can restore email deleted from the Trash within 30 days.
3-1.Right click 「Trash」, then click 「Recover Deleted Items」 in shown list.
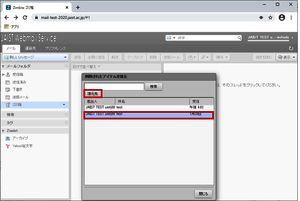
3-2.Select email you want to restore, then click 「Recover To」.
3-3.Select a folder to restore, and then click 「OK」.
SPAM mail
When email is filtered by the SPAM filters, it automatically moved to 「Junk」 folder.
SPAM filters
1.SPAM Obvious SPAM mail
2.Suspected SPAM Possible SPAM mail
※Both SPAM filters move emails to 「Junk」 folder at the default settings.
Emails in 「Junk」 folder will be completely deleted after 30 days.
You had better to check out regulary in case of missing email you received.
If you want to move emails in 「Junk」 folder to another folder,
click emails and use the icon of 「Move selected item(s)」, or
drag and drop emails to another folder.
Edit SPAM Policy
Classic UI
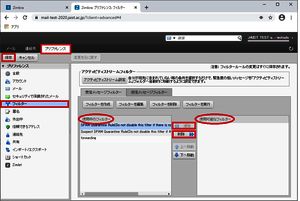
1.Select 「Preferences」 tab and click 「Filters」.
2.Edit SPAM Policy.
inactivate - Select SPAM Policy in 「Active Filters」 and click 「Remove」.
activate - Select SPAM Policy in 「Available Filters」 and click 「Add」.
3.Click 「Save」.
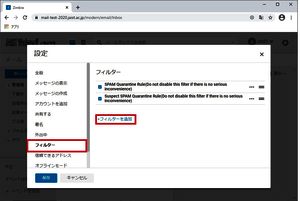
Modern UI
1. Click the gear icon ☸ at the top right of the screen, and click 「Settings」 from the View menu.
2. Select 「Filter」.
3. Uncheck the SPAM policy you want to disable and check the SPAM policy you want to enable.
4. Click 「Save」.
Secure Email
Secure Email is one of the encryption methods that improve the security of e-mails. You can use digital certificates to encrypt e-mails and digitally sign e-mails.
If the email you sent is frequently judged to be SPAM, we recommend that you use the Secure Email function 「Send email with a digital signature」.
Procedure for sending an email with a digital signature
Classic UI
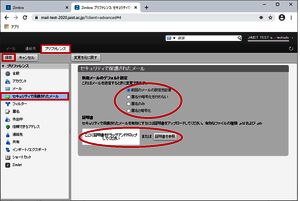
- On the 「Preferences」 tab, select 「Secure Email」.
- Check 「Signature only」 in 「Default settings for new mail」 and drag and drop a valid certificate in the 「Certificate」 field or specify a valid certificate from the browse button.
- Click 「Save」.
- Compose and send emails as usual and all emails will be digitally signed.(Or, on the mail composition screen Select 「Signature」 from the menu displayed at the top of the window and send.)

Modern UI
- Click the gear icon ☸ at the top right of the screen, and click 「Settings」 from the View menu.
- Select 「S/MIME and Encryption」.
- Check 「Sign」 in 「Default settings for new mail」 and if "You do not have any security certificates currently" in the 「Certificate」, click 「+Add a certificate」to import a valid certificate.
- Click 「Save」.
- Compose and send emails as usual and all emails will be digitally signed.(Or, on the mail composition screen Select 「Sign」 from the menu displayed at the top of the window and send.)
Reject Email
You can reject email from particular addresses and domains.
Classic UI
Select 「Preferences」 and click 「Mail」.
You will find 「Spam Mail Options」 when you scroll down the display.
Enter the email address (domain) in 「Block messages from:」 and then click 「Add」.
After all, click 「Save」 in up left side of the browser.
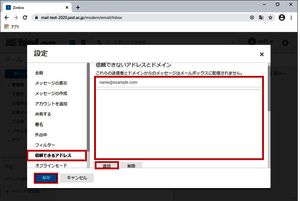
Modern UI
1. Click the gear icon ☸ at the top right of the screen, and click 「Settings」 from the View menu.
2. Select 「Trusted Address」.
3. Enter the address or domain you want to reject in the 「Untrusted Addresses and Domains」 field, and add or save.
Forward Email
You can forward emails when you receive emails.
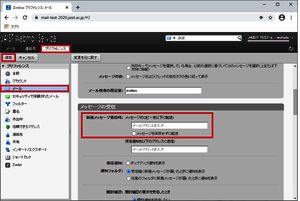
Classic UI
Click 「Preferences」tab and click 「Mail」.
Scroll down display and find 「Receiving Messages」.
Enter email address, you want to forward to, in Message Arrival.
※When you check the box of 「Remove local copy of message:」, a copy of email does NOT remain in the server. Also, be sure to update the settings promptly if there is a change in the transfer destination address.
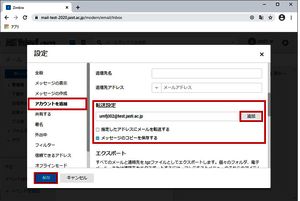
Modern UI
1. Gear icon at the top right of the screen ☸ → Click 「Settings」.
2. Select 「Add Account」.
3. Expand your account, enter the forwarding address in the 「Forwarding Settings」 field, and click 「Add」 to save.
※ If you uncheck 「Save a copy of the message」, no copy of the mail will remain on the server.
POP / IMAP disabled / enabled
Classic UI
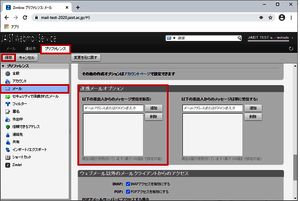
Select Email on the 「Preferences」 tab.
Operate the check of 「Enable IMAP access」 and 「Enable POP access」 in 「Access from mail clients other than webmail」.
Checked:Enable
Unchecked:Unenable
Click 「Save」.

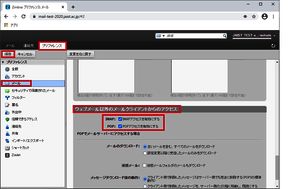
Modern UI
- Gear icon at the top right of the screen ☸ → Click 「Settings」.
- Select 「Access from Other Mail Clients」.
- Operate the check of 「Enable IMAP access」 and 「Enable POP access」 in 「Access from Other Mail Clients」.
Checked:Enable
Unchecked:Unenable - Click 「Save」.
Filters

You can use Filters to move emails to particular folders when you receive emails.
Classic UI
Click 「Preferences」tab and click 「Filters」.
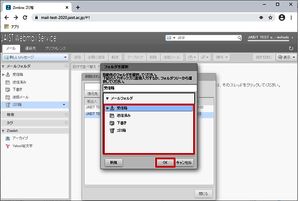
then Click 「Create Filter」.
Enter the details of filters, then click 「OK」.
Click 「Save」.
Modern UI
1. Gear icon at the top right of the screen ☸ → Click 「Settings」.
2. Select 「Filter」 and click 「Add Filter」.

3. Enter the filter conditions and click 「Save」.
4. Click 「Save」 on the original screen.
Language Settings
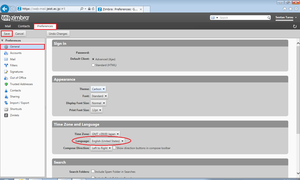
Classic UI
From Preferences, you can change the display language of Web-Mail.
Select 「Preferences」 and click 「General」.
You can choose the language from the list of Language in 「Time Zone and Language」.
Modern UI
Gear icon at the top right of the screen ☸ → You can change the display language of Web-Mail from 「Language」.
FAQ
Mailing List
For the main mailing lists of the faculty and staff, please contact the General Service Section, General Affairs Department.
For students' main mailing lists, please contact the Educational Service Section, Educational Affairs Department.
List of Primary Mailing Lists (Internal Use Only)
If you are the Administrator (Owner) of the Mailing List, you can.
Log in the system and choose the list to confirm from "My lists" or "Search for List(s)" in Menu at the upper part of the screen. Click "Error rate: xx%" in Menu at the left side of List Home screen to find the mail addresses of Members (Subscribers) who fail to receive the email if any.
Maximum data size to send to a ML address is 15 MB (the sum of an attached file and mail text message). If you want to send/receive a large file of more than 15MB, please use JAIST Online Storage System.
Please also read "Failing to send a mail to ML".
The mailing list "xxx-request@ml.jaist.ac.jp" is an email address addressed to the owner of the mailing list "xxx@ml.jaist.ac.jp". It is automatically created when you create a mailing list.
Please note that if you send an email to "xxx-request@ml.jaist.ac.jp", it will not reach the member of "xxx@ml.jaist.ac.jp".